Pixel graphics are multicolored images or photos composed of individual pixels (picture elements). The pixels are arranged in a grid, hence the term "grid graphics" (sometimes called "raster graphics"). Each pixel is assigned color information, the sum of which produces the picture. With Spreadshirt, pixel graphics serve as a template for digital printing. So that we can achieve the best possible result in printing with your graphics, please bear in mind the following tips:
Requirements for your pixel design
- PNG, JPG, BMP or GIF file format
- Maximum file size 10 MB
- Image resolution at least 200 dpi
- Maximum size 4000 x 4000 pixels
- Design is isolated
Find the requirements for poster designs here.
Optimizing image resolution
Photos or graphics in PNG, JPG, GIF or BMP formats consist of pixels (picture elements) arranged in grid form, each of which is assigned multiple color information. The number of pixels in width and height also later determines the size of the print.
We print textiles at 200 dpi. The abbreviation dpi stands for dots per inch, and this provides information on the density of the picture elements. A graphic that is 1000 pixels wide, for example, produces a design 5 inches wide when printed at 200 dpi. A 2000 pixel-wide graphic produces a 10 inch-wide design, etc.
A design with a low pixel width or height (for example, 800 x 600 pixels) cannot therefore be easily enlarged without loss of quality (for example to 4.7 x 4 inches or more). Because of the "missing" pixels, the print would probably look blurry and out of focus. So only upload designs with sufficient resolution and number of pixels. We recommend 200 dpi and a maximum of 4000 x 4000 pixels, so as not to exceed the maximum file size of 10 MB.
Removal of unwanted backgrounds
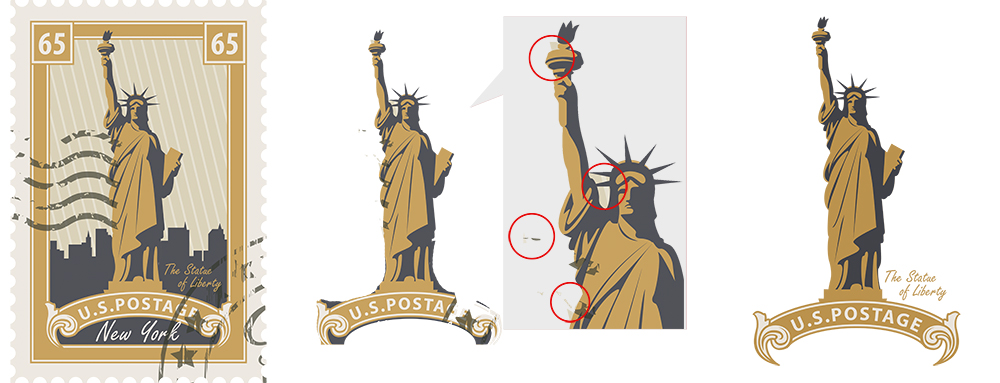
People frequently want to print a motif cut out of a photo or picture, and not the background itself. But it is not enough simply to create a white background, because this will mean that a white area is printed, which will be visible on both colored and white products. Backgrounds must be transparent so that they are ignored by our printer. Isolate your motif in a graphics program and save it as a PNG. Perhaps the following instructions for removing the background from a motif in Photoshop will be helpful:
Removing the background with Photoshop
- Open your pixel graphic in Photoshop.
- Select the "wand" tool.
- With the wand, select the area to be removed, e.g. the background.
- Remove the selected area (with "del").
- Repeat the process until the background is completely removed.
- Make sure that all areas of the background have now really been removed. Zoom in to see if small groups of pixels still remain at the edges. Remove these if possible.
- Save the isolated graphic in PNG format. If this format is not an option when saving, change the color space under "Image -> Mode" to RGB color space. This is important because some file formats, such as for example JPG, do not recognize transparent surfaces and provide the isolated image with a white background when you save it.
Removing the background with GIMP
- Go to the Layers Palette (on the right side. If it is not there go Window > Layers - Brushes). If the name of your file is Background, then it will need renamed by right clicking on the name and choosing ‘Edit Layer Attributes’. Change the name to anything.
- Next make sure that the image is in the RGB color scale. Select ‘Image’ from the top menu, then select ‘Mode’ from the box and make sure RGB is selected.
- Create a new layer that is transparent. Right click on your original layer and choose ‘New Layer’. Under Layer Fill Type, choose Transparency. Click OK.
- Click and drag your now transparent layer (which should look like a checkerboard) underneath your original layer.
- Right click your top layer and click ‘Merge Visible Layers’. In the pop up box click Merge.
- Select the ‘fuzzy select tool’, the first row, second tool from the right in the tool bar.
- Set the threshold (located under Tool Options in the Toolbox) to around 15.
- Click anywhere in the background and hit ‘Delete’ on your keyboard. This should reveal a checkerboard.
- Go Select > None to deselect the ‘marching ants’.
- Export the file as an PNG image. File > Export.
Speckling color transitions
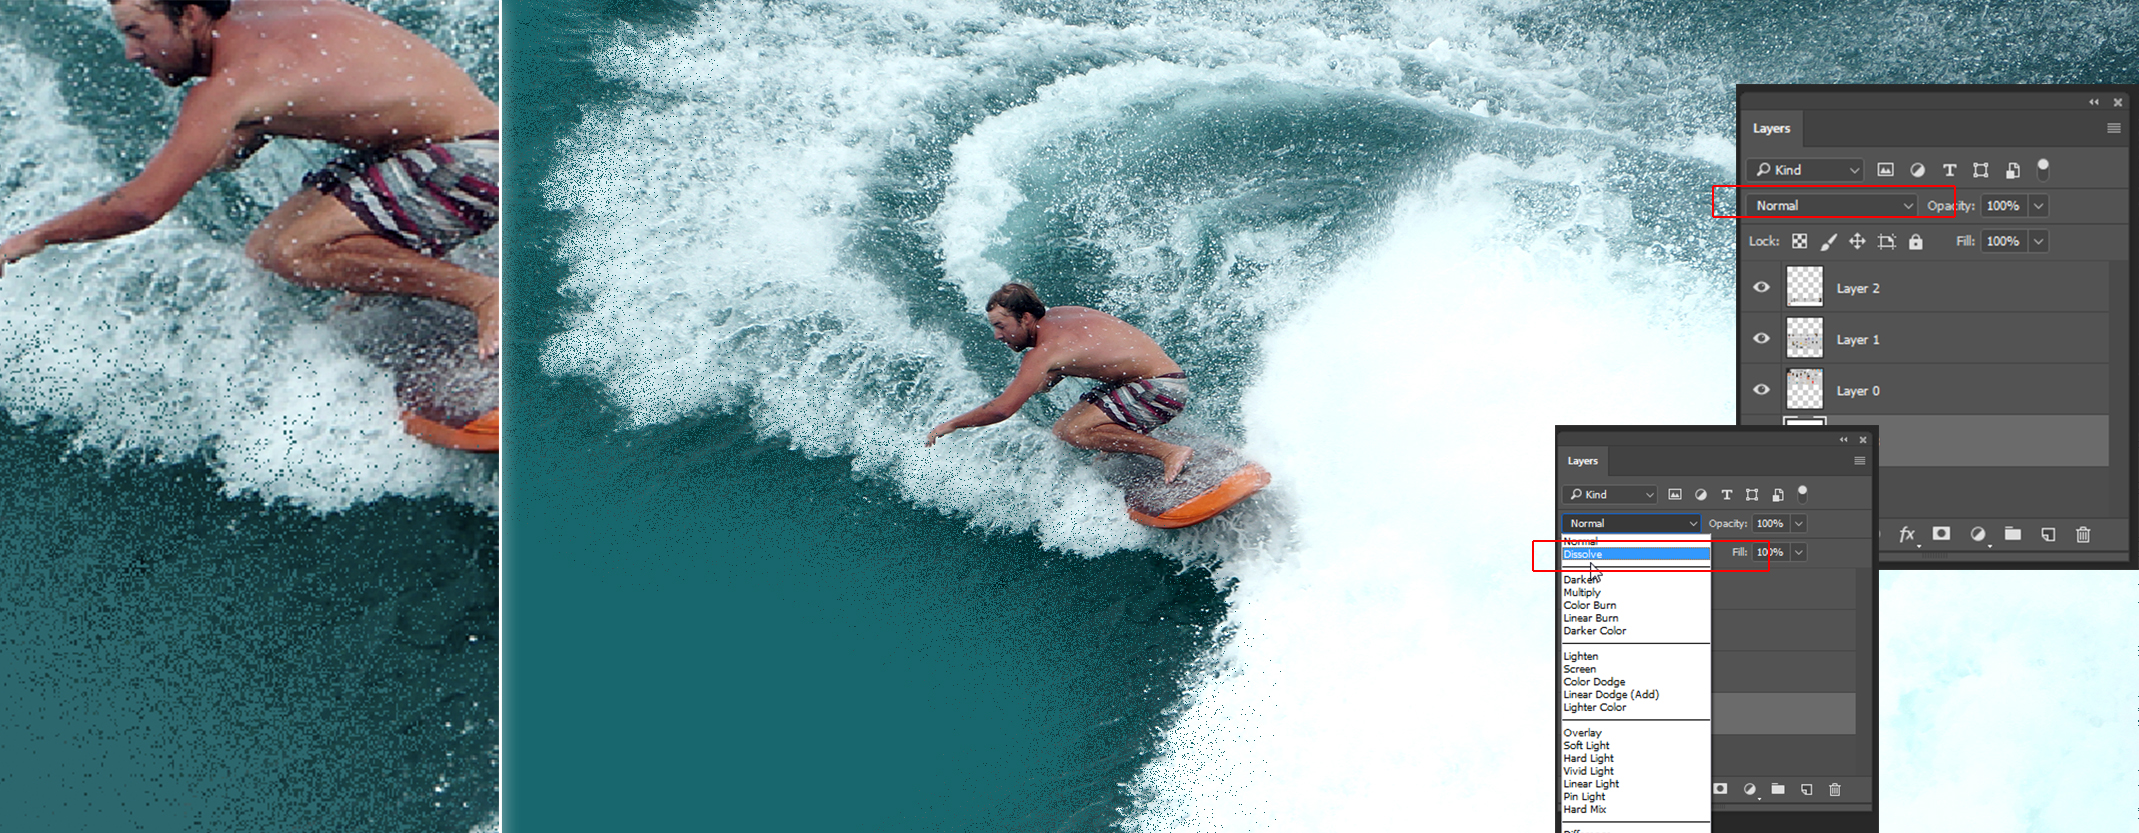
Digital printers work in a similar way to inkjet printers: the ink is sprayed directly onto the product. To achieve the highest possible fidelity to the colors of the design, a white layer is first sprayed onto colored products as a base. If your design has a transparent color transition running to the edges, this white base can show through on dark products. To prevent this, use the "speckle" tool in your graphics program. Advanced users can also use the "dither" function.
Taking color differences into account in CMYK and RGB mode
On the screen, colors often appear brighter than on the printed shirt. This is what you can do to make sure the colors come out just as nicely in print as on the screen:
- Increase the contrast and saturation of your graphics to a very high degree. What may look a bit ”too much” on the screen will look just right in print.
- Always upload your graphics in RGB mode. Our software systems work with this color scheme, and that's why smaller color deviations are to be expected with RGB files than with CMYK files.
Read more about the different color effects on the monitor and shirt.