Vector designs will be printed with digital direct or plot printing. Vector graphics are necessary for plot printing. We use a machine for plot printing which punches out your design on color foil. Then a member of the Spreadshirt staff "weeds" the design: that is, removes the unnecessary pieces of film. The weeded design is then positioned on the t-shirt and pressed on using high heat and pressure. The carrier film is peeled off and, voilà, the t-shirt is finished.
Vector design requirements for plot printing:
- We support SVG, AI and CDR file formats.
- Your design must not exceed 15 x 15 inches. We recommend 11 x 11 inches as the ideal size.
- Lines and other parts of the design must have a diameter of at least 0.06 inches.
- Maximum 3 colors: we can print up to three colors when plotter printing.
- Please create each color in your design as a separate layer.
- All objects and text to be printed must be converted into paths.
- Make sure that all curves are completely closed and do not overlap each other.
Find the requirements for poster designs here.
Measuring and increasing line thickness
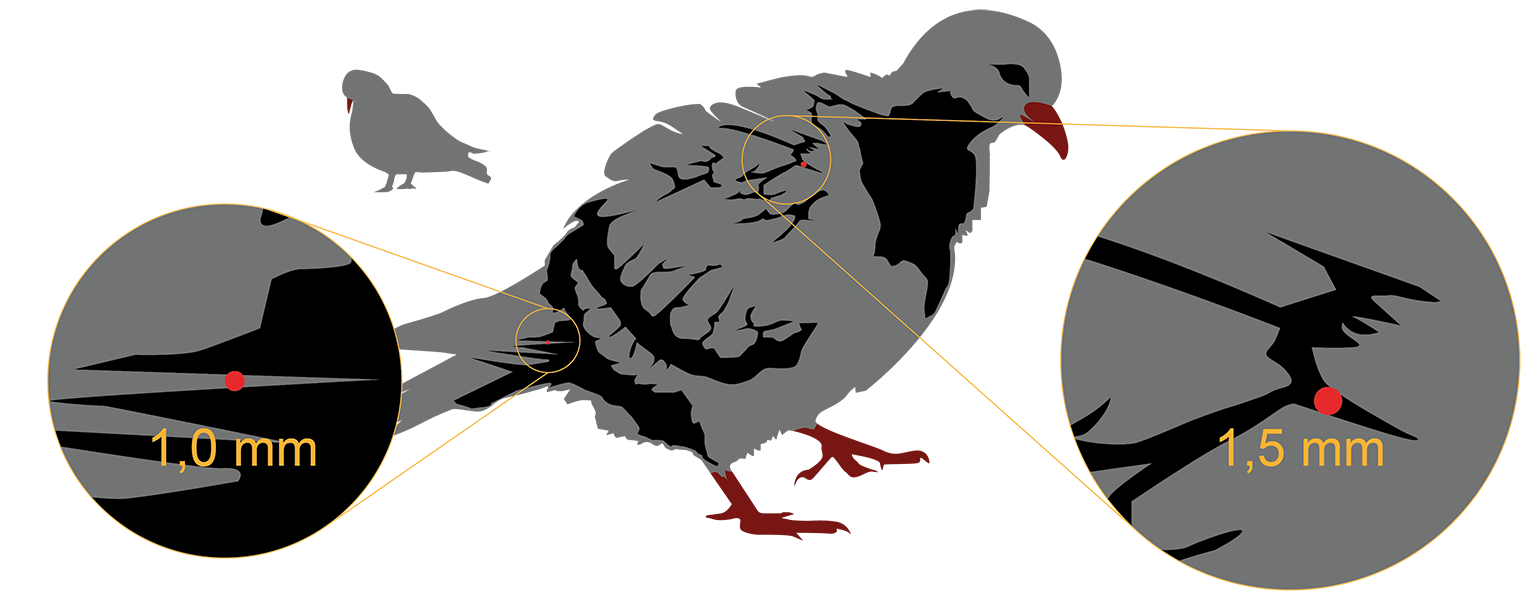
If parts of the design are thinner than the required line width, they can tear during weeding and make the print motif unusable. If gaps in the motif or whole parts of the motif are too small (e.g. dots), they may possibly be overlooked during weeding or be difficult to detach. In addition, fine lines do not adhere as well to the shirt and may peel off. Lines and other parts of the motif must therefore have a diameter of at least 0.06 inches and gaps between elements should be at least 0.04 inches.
This is how you measure line width: to check whether the lines in your motif are thick enough, create a circle with a diameter of 0.06 inches and lay it on top of the thinnest line in your motif. If the circle fits inside the line without protruding, it is thick enough. Do the same with a 0.04-inch diameter circle to measure the gaps in your design. If the circle fits inside the narrowest gap, it is big enough.
Important: if you increase the line width, make sure that your overall design is no larger than 15 x 15 inches. It is best to aim for a size of 11 x 11 inches, so that it fits on most of our products.
Checking and closing curves

When the plotter machine punches out your design, it cuts it out of the printing film along the curves. If the plotter machine finds an open end in a curve, it tries to close it. It looks for any anchor point nearby and cuts a straight line down to this point. If the curve is not closed, there will be defects in the design.
So ensure that you do the following:
- Check that you have really converted all the parts of your design into curves. Unconverted elements will not be printed, as our printer will not recognize them.
- Check that you have really closed all the curves in your design. You can use the "combine" or "merge" function in your graphics program to do this.
- If there are any remaining elements which overlap or are not required, remove them.
Reduce the number of anchor points
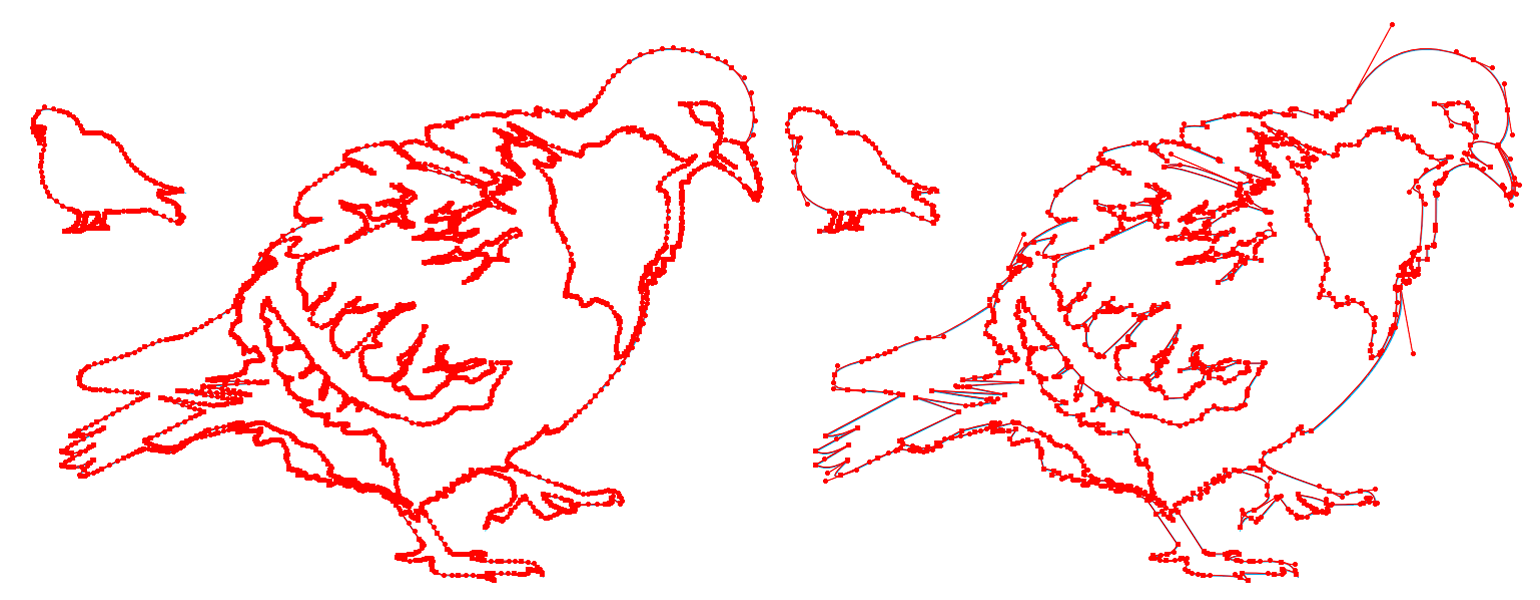
Whenever the plotter machine reaches an anchor point when cutting out along the curves on your design, it changes its direction. Superfluous anchor points on a line result in uneven lines and a messy-looking design.
So when you are creating your vector graphic, use as few anchor points as possible. One start point and one end point are sufficient for a straight line. Your design should have a maximum of 2000 anchor points per color (maximum 6000 for a three-colored motif).